Setting up waterfall logic
How to configure logic to orchestrate multiple sequential API calls.
About this guideIn this guide we explore how to setup a waterfall (daisy-chain) for a realtime Data API. This allows your team to orchestrate a sequence of data calls and optimise for specific goals such as match rate, performance or costs.
Steps
1 - Create a new Data API
Navigate to https://demyst.com/app/create-api and include the Connector that you want to include in your new Data API.
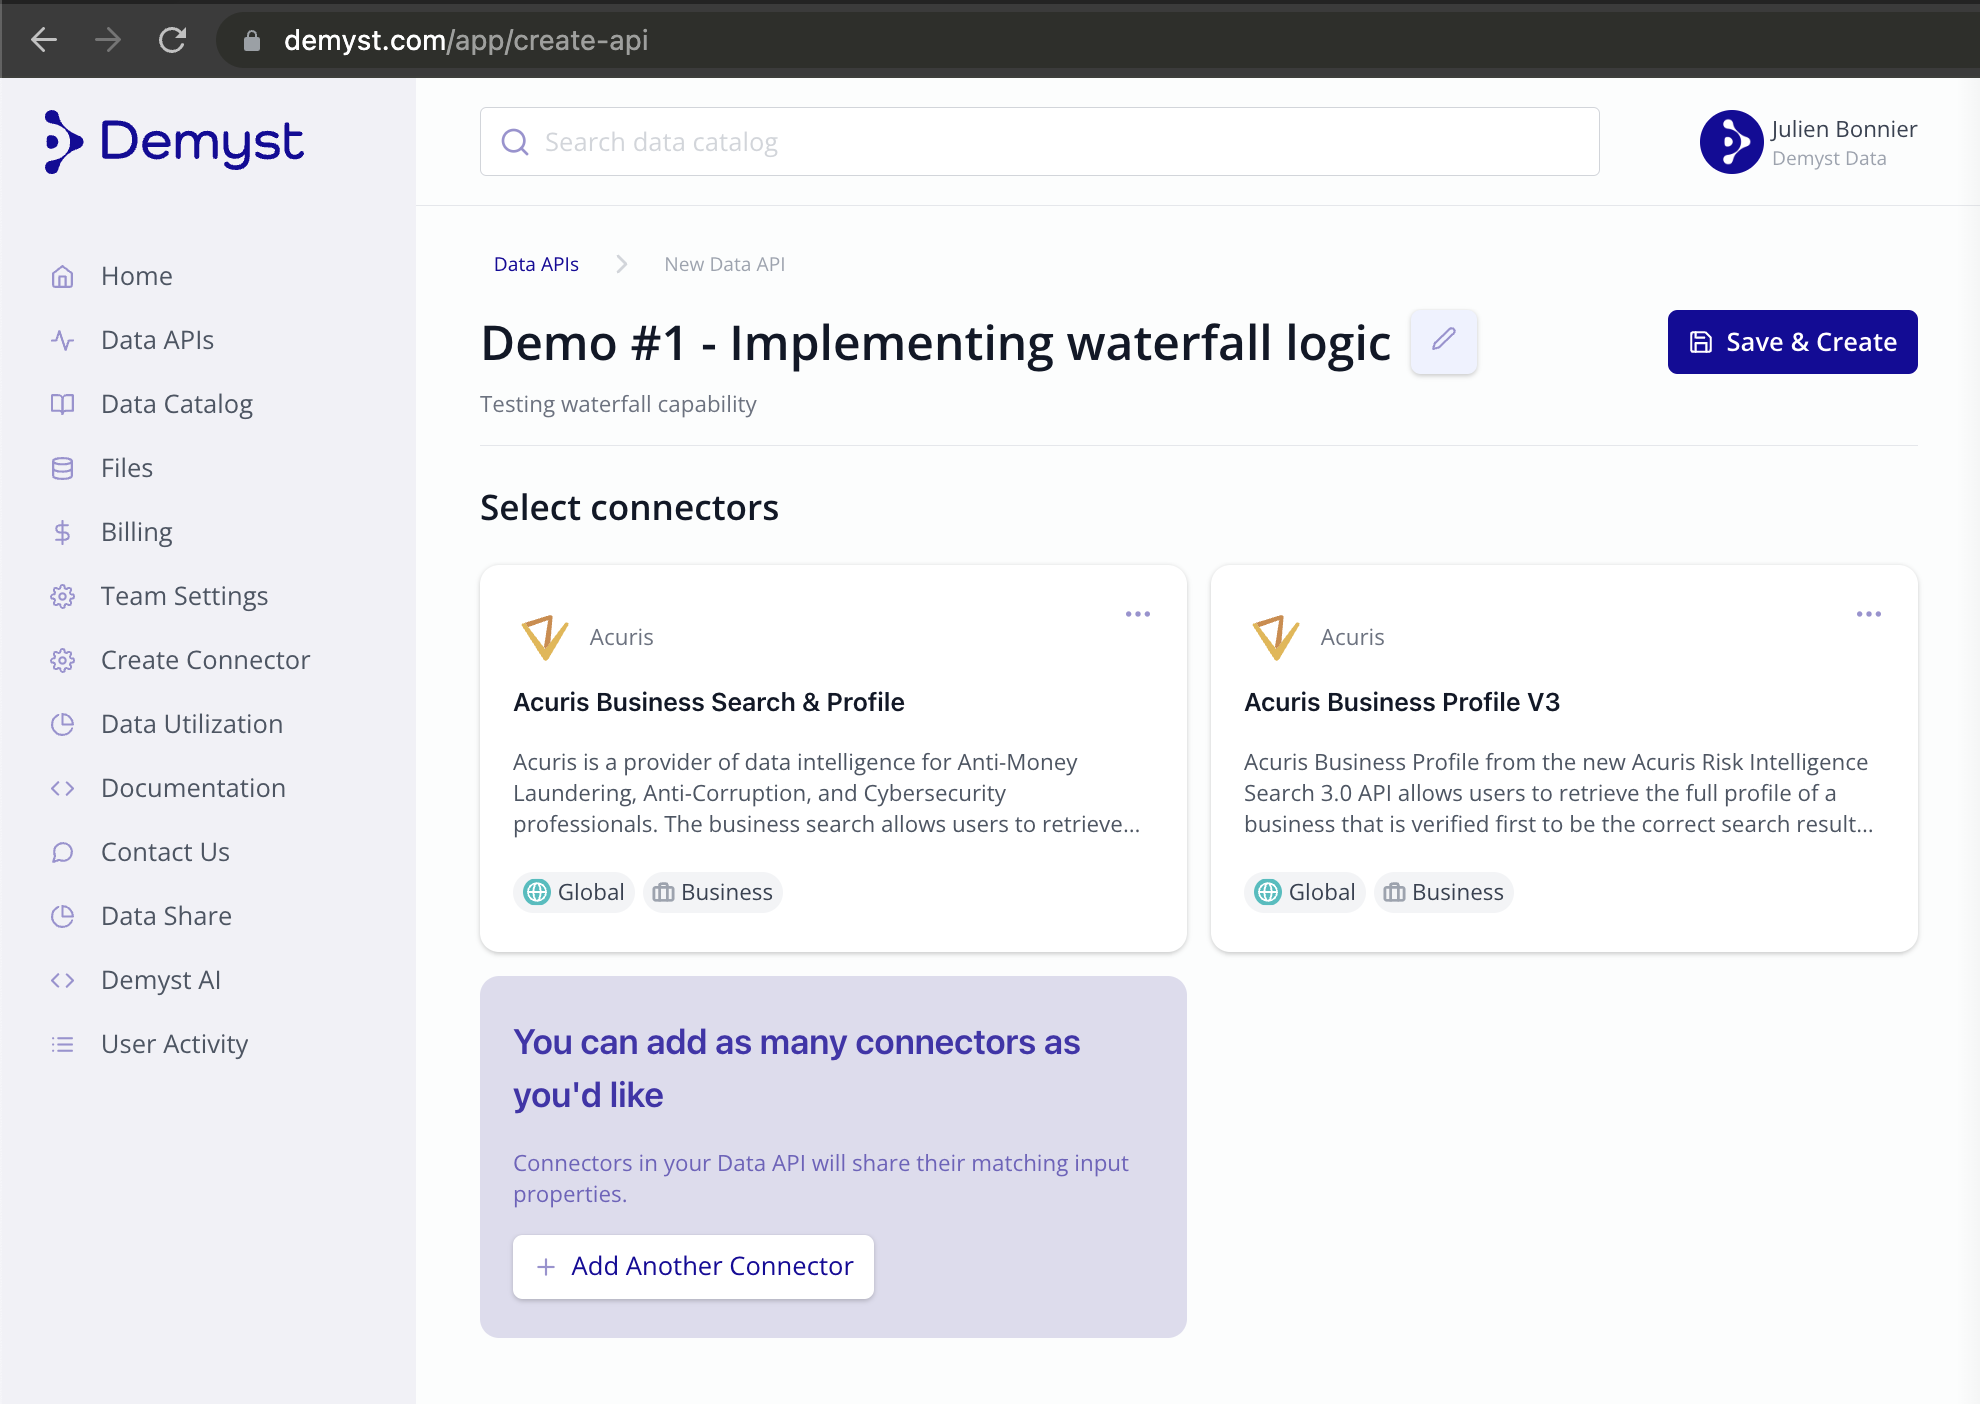
Creating a new data API
2 - Configure waterfall logic
Navigating to your new Data API will allow you to experiment with it and define the logic. From there, navigate to the configuration under settings. To create a waterfall sequence, the inputs to a Connector must be linked to the outputs of another.
As an example below, we created a waterfall where acuris_v3_business_search was called first, and the resource_id found in the response was then used to call acuris_v3_business_profile as an input
{
  "providers": {
    "acuris_v3_business_search": {
      "version": "$latest"
    },
    "acuris_v3_business_profile": {
      "version": "$latest",
      "inputs": {
        "resource_id": "acuris_v3_business_search.results.matches[*].resource_id"
      }
    }
  }
}
That configuration can be saved in the Data API directly.
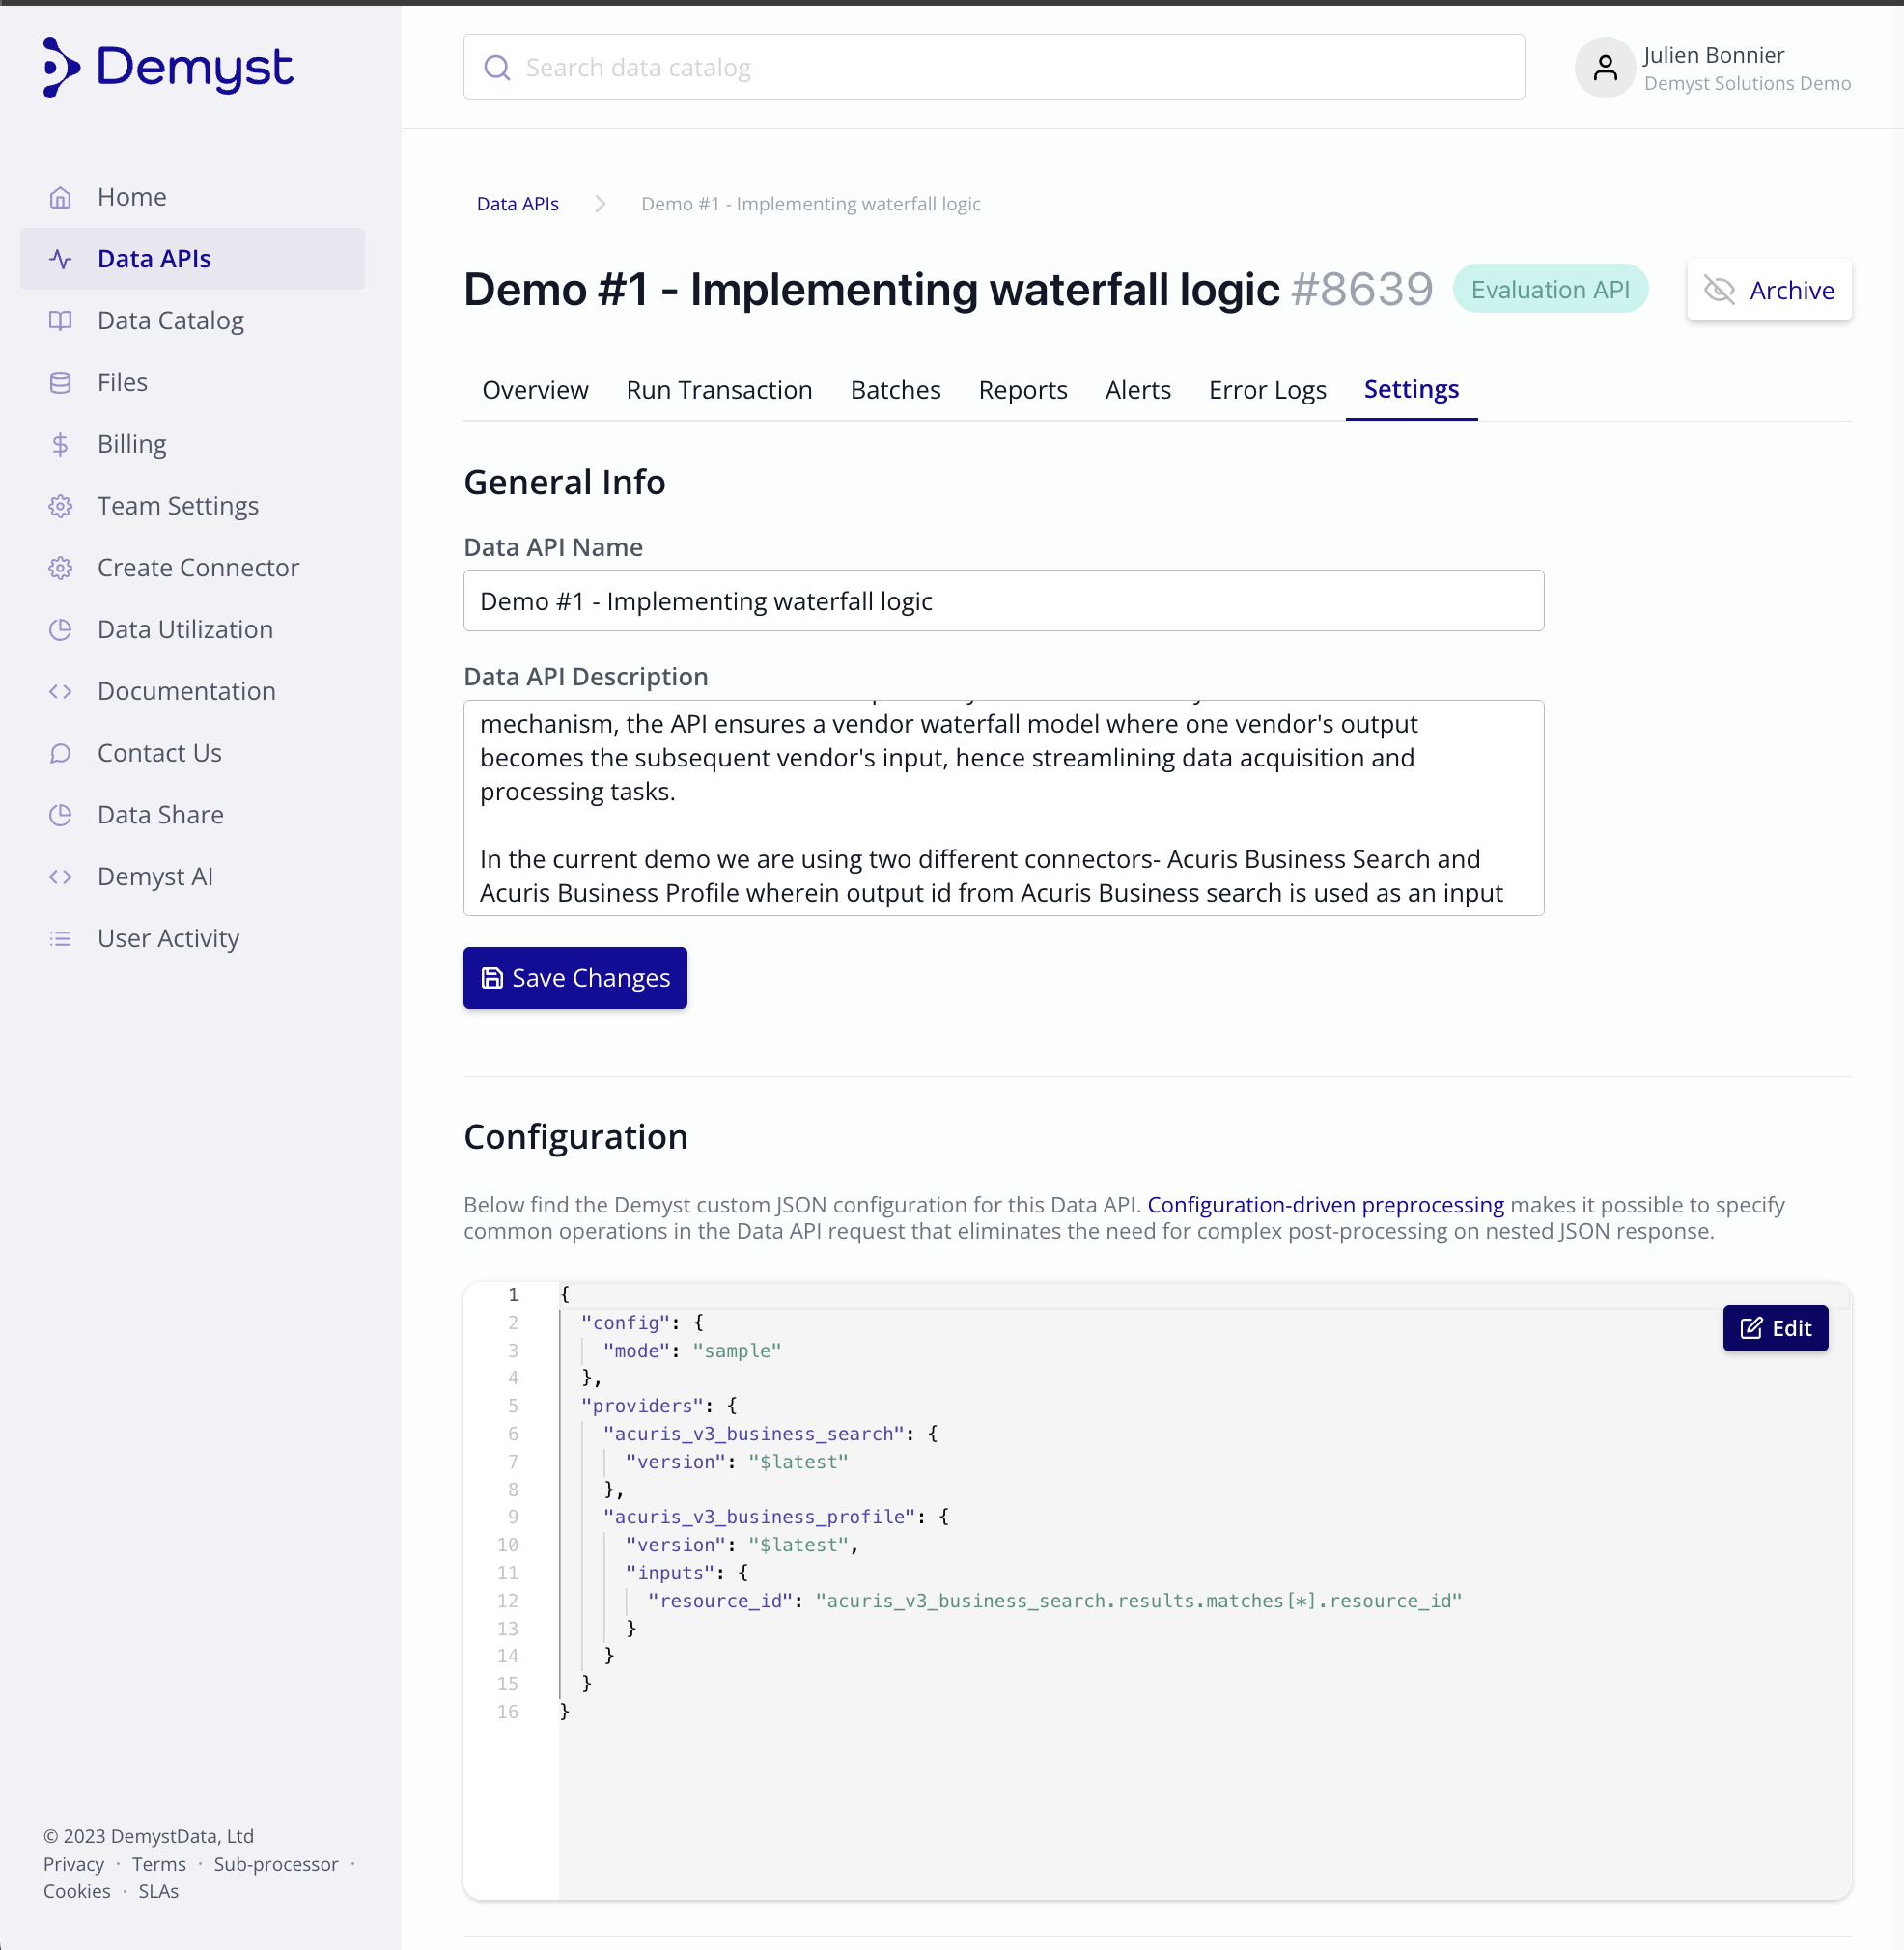
Saving Config in the Settings tab
Saving that config will now allow you to run transactions and integrate the newly created Data API and start receiving data.
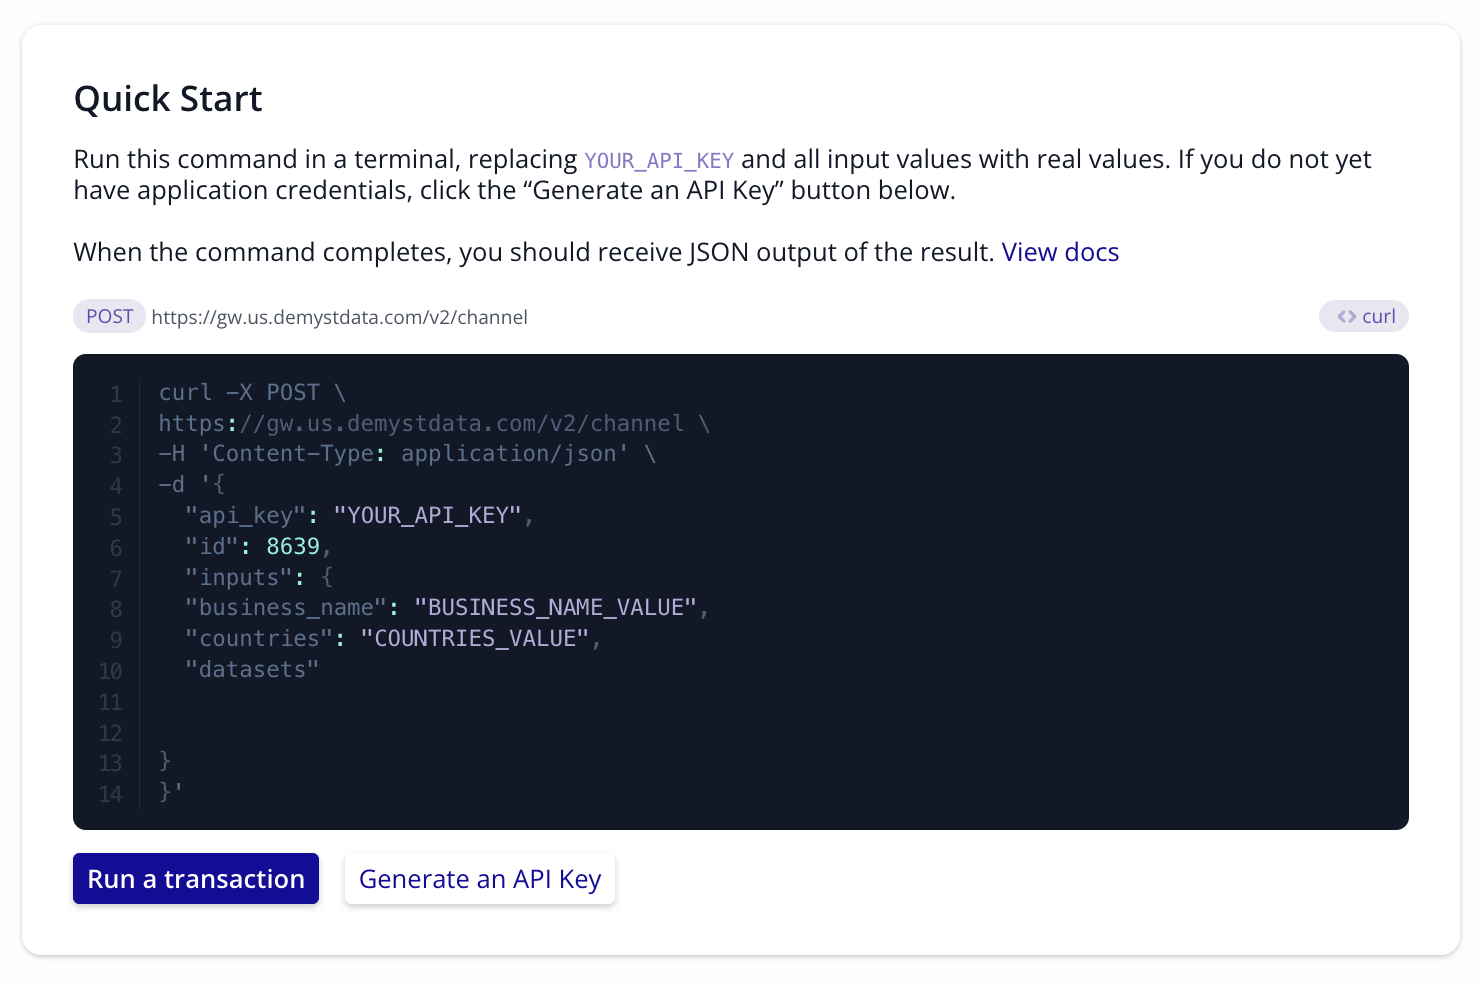
Example integration guide for a new API ID#8639
Your API is now configured.
Additional details
Syntax
- A JSON object
- The left-hand side will always be an attribute name
- The right-hand side is a path to an attribute from an arbitrary connector or the attribute from the inputs section
Example scenario
- Pre-fill: Getting additional details about a subject. For example, getting a business address from a business name in order to get metrics for a property risk analysis.
- Search products: You may want to pass search results to another provider, and can solve this by specifying which attributes map to which input parameter. You could also pass a mix of attributes - from another provider output and an attribute from the initial inputs section
Payload example
Here are some examples of waterfall logic being implemented.
# Take the output of the first Connector call as an input to the second Connector call
{
  "providers": {
    # Search Connector will be called first
    "tloxp_business_search": { "version": 2 },
    # Report Connector will be called once first call completed
    "tloxp_business_report": {
      "version": "$latest",
      "inputs": {
        # the business_id field will leverage the ID field returned from the search Connector
        "business_id": "tloxp_business_search.business.id"
        "country": "inputs.country"
      }
    }
  }
}
{
"config": {
"mode": "sample"
},
"providers": {
"acuris_v3_business_search": {
"version": "$latest"
},
"acuris_v3_business_profile": {
"version": "$latest",
"inputs": {
"resource_id": "acuris_v3_business_search.results.matches[*].resource_id"
}
}
}
}Updated 7 months ago