Leveraging multiple Connectors to set up an API
About this guideLearn how to create a Data API that leverages multiple Connectors allowing you to access realtime data.
Ability to create a Data API that can leverage data from multiple Connectors to transact in realtime. The Data API is configured with specific limited logic through Demyst's proprietary Data API configuration language. Combining multiple Connectors is the first step to building logical workflows and applying data transformations on top of it.
Make sure to have a look at the below recipe to learn how to integrate multiple Connectors into your Connectors.
Steps
1 - Create a new Data API
Navigate to https://demyst.com/app/create-api and include the Connectors that you want to include in your new Data API.
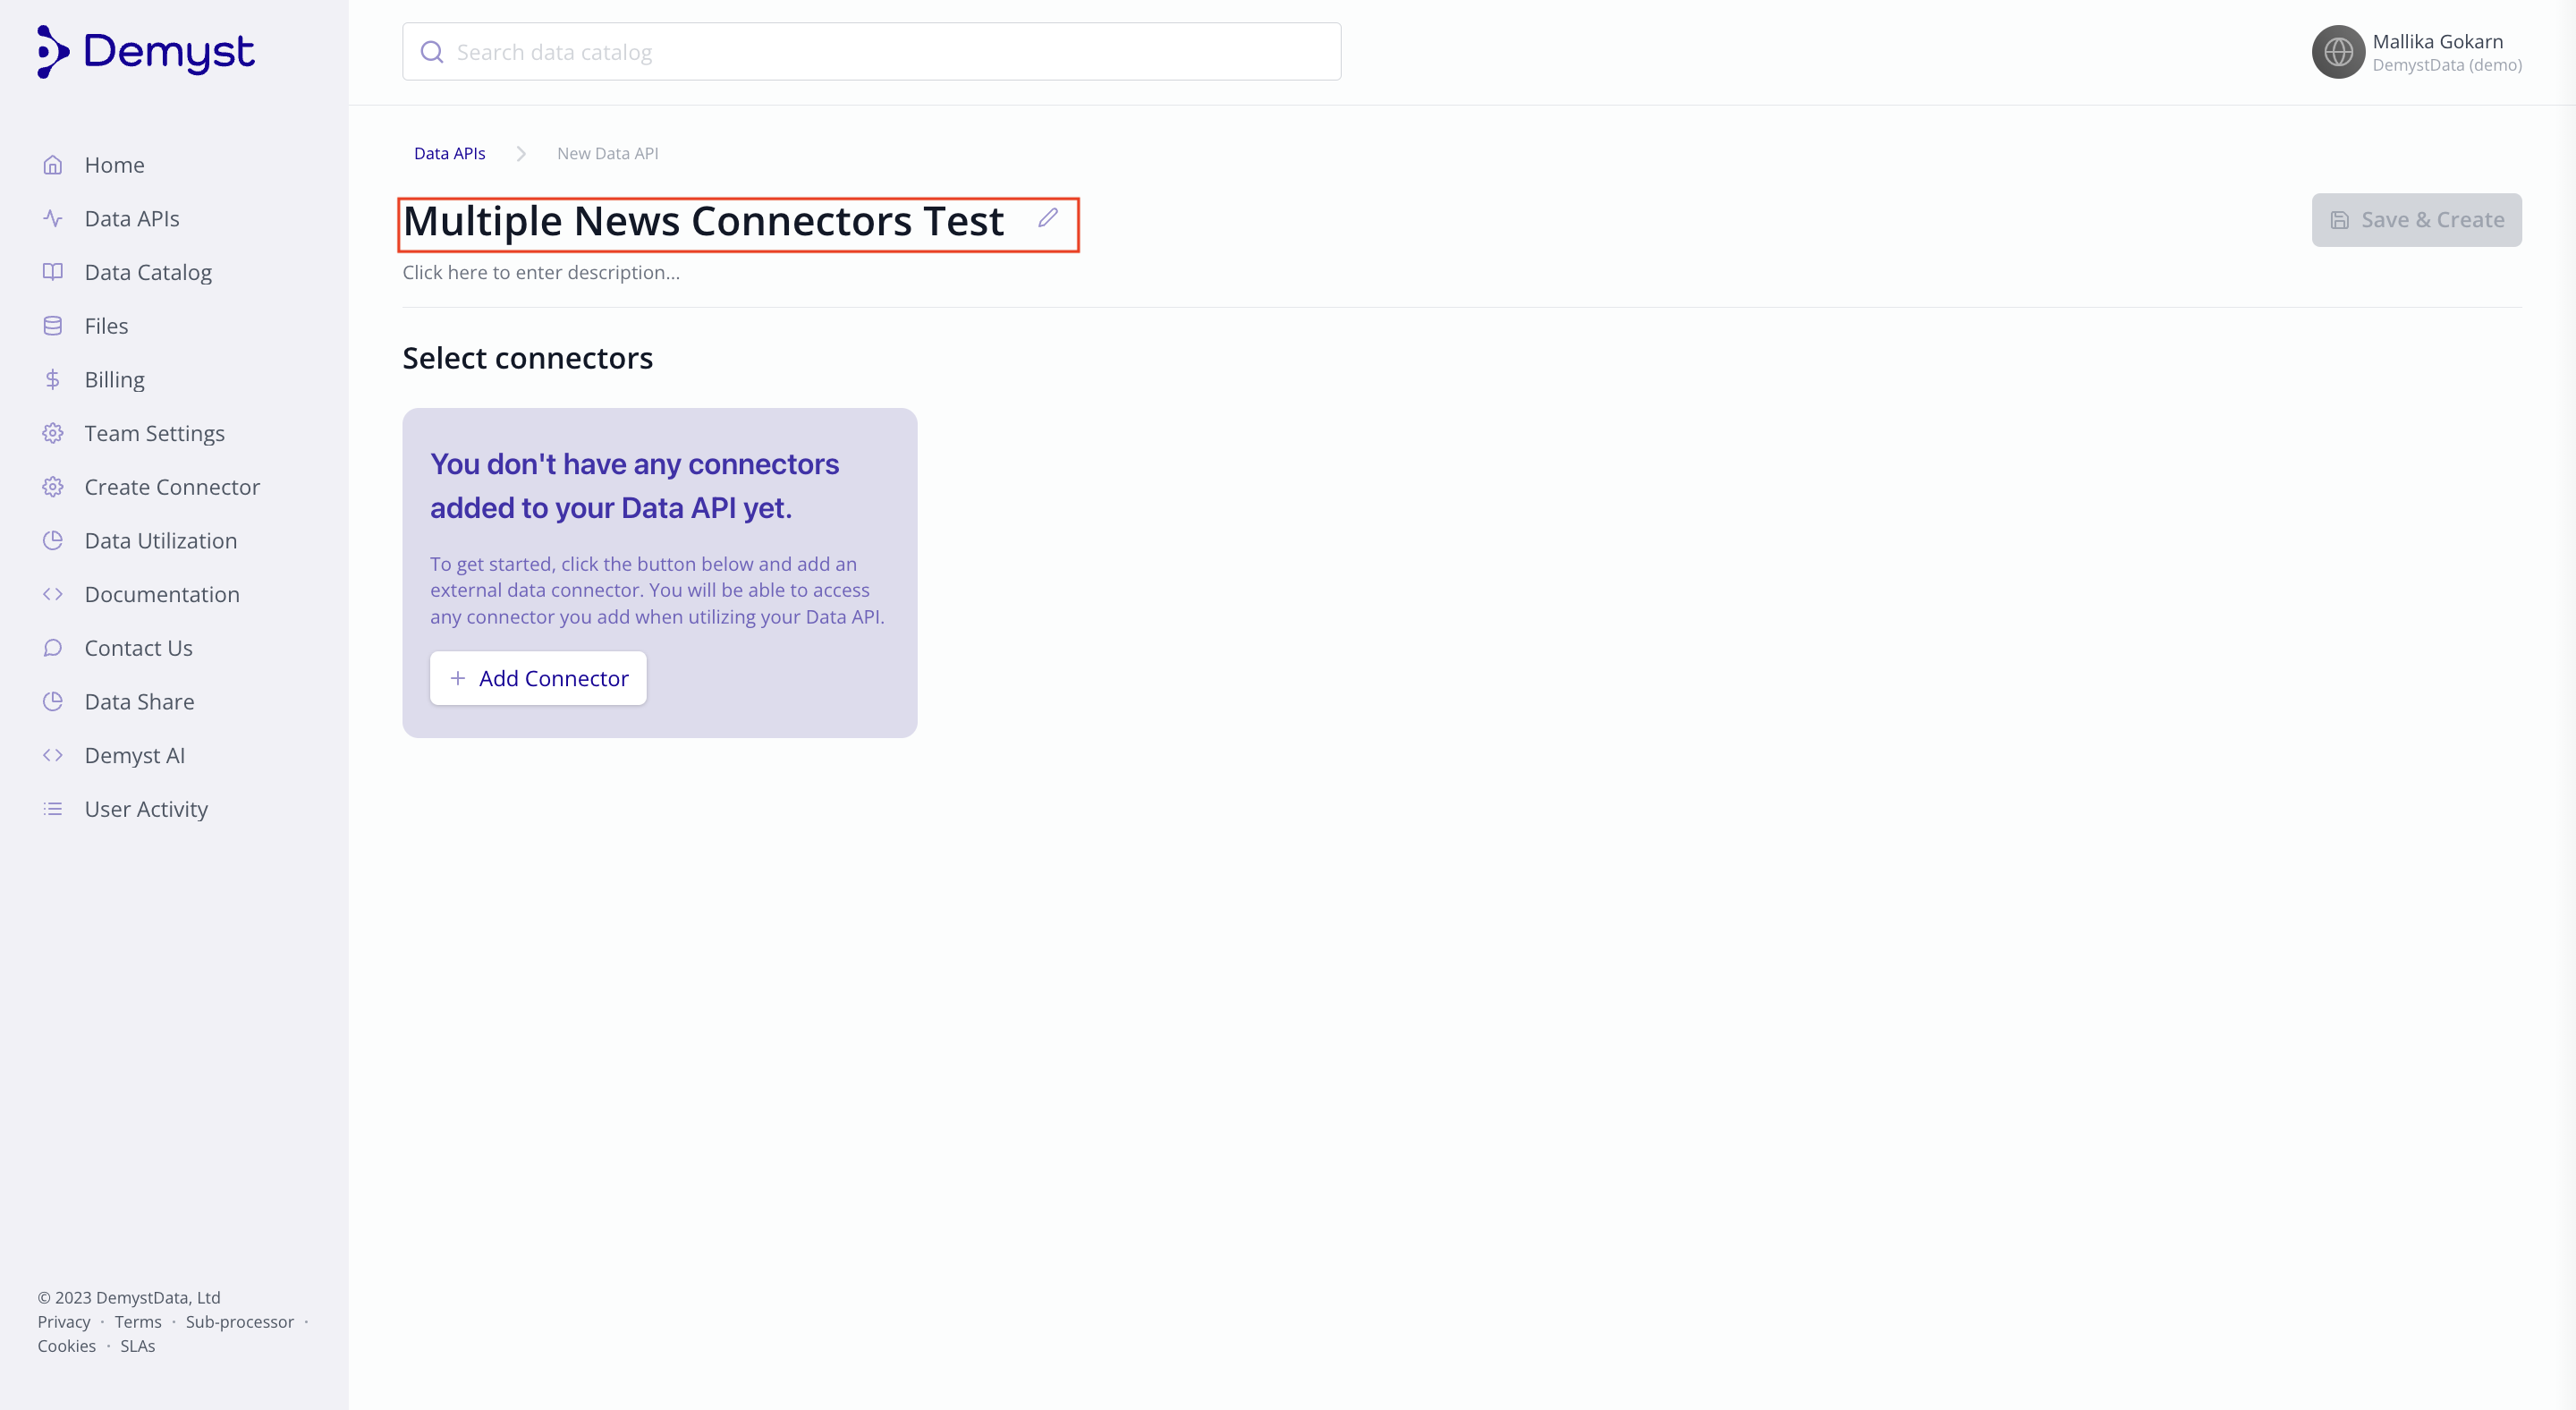
Include a name for your new Data API.
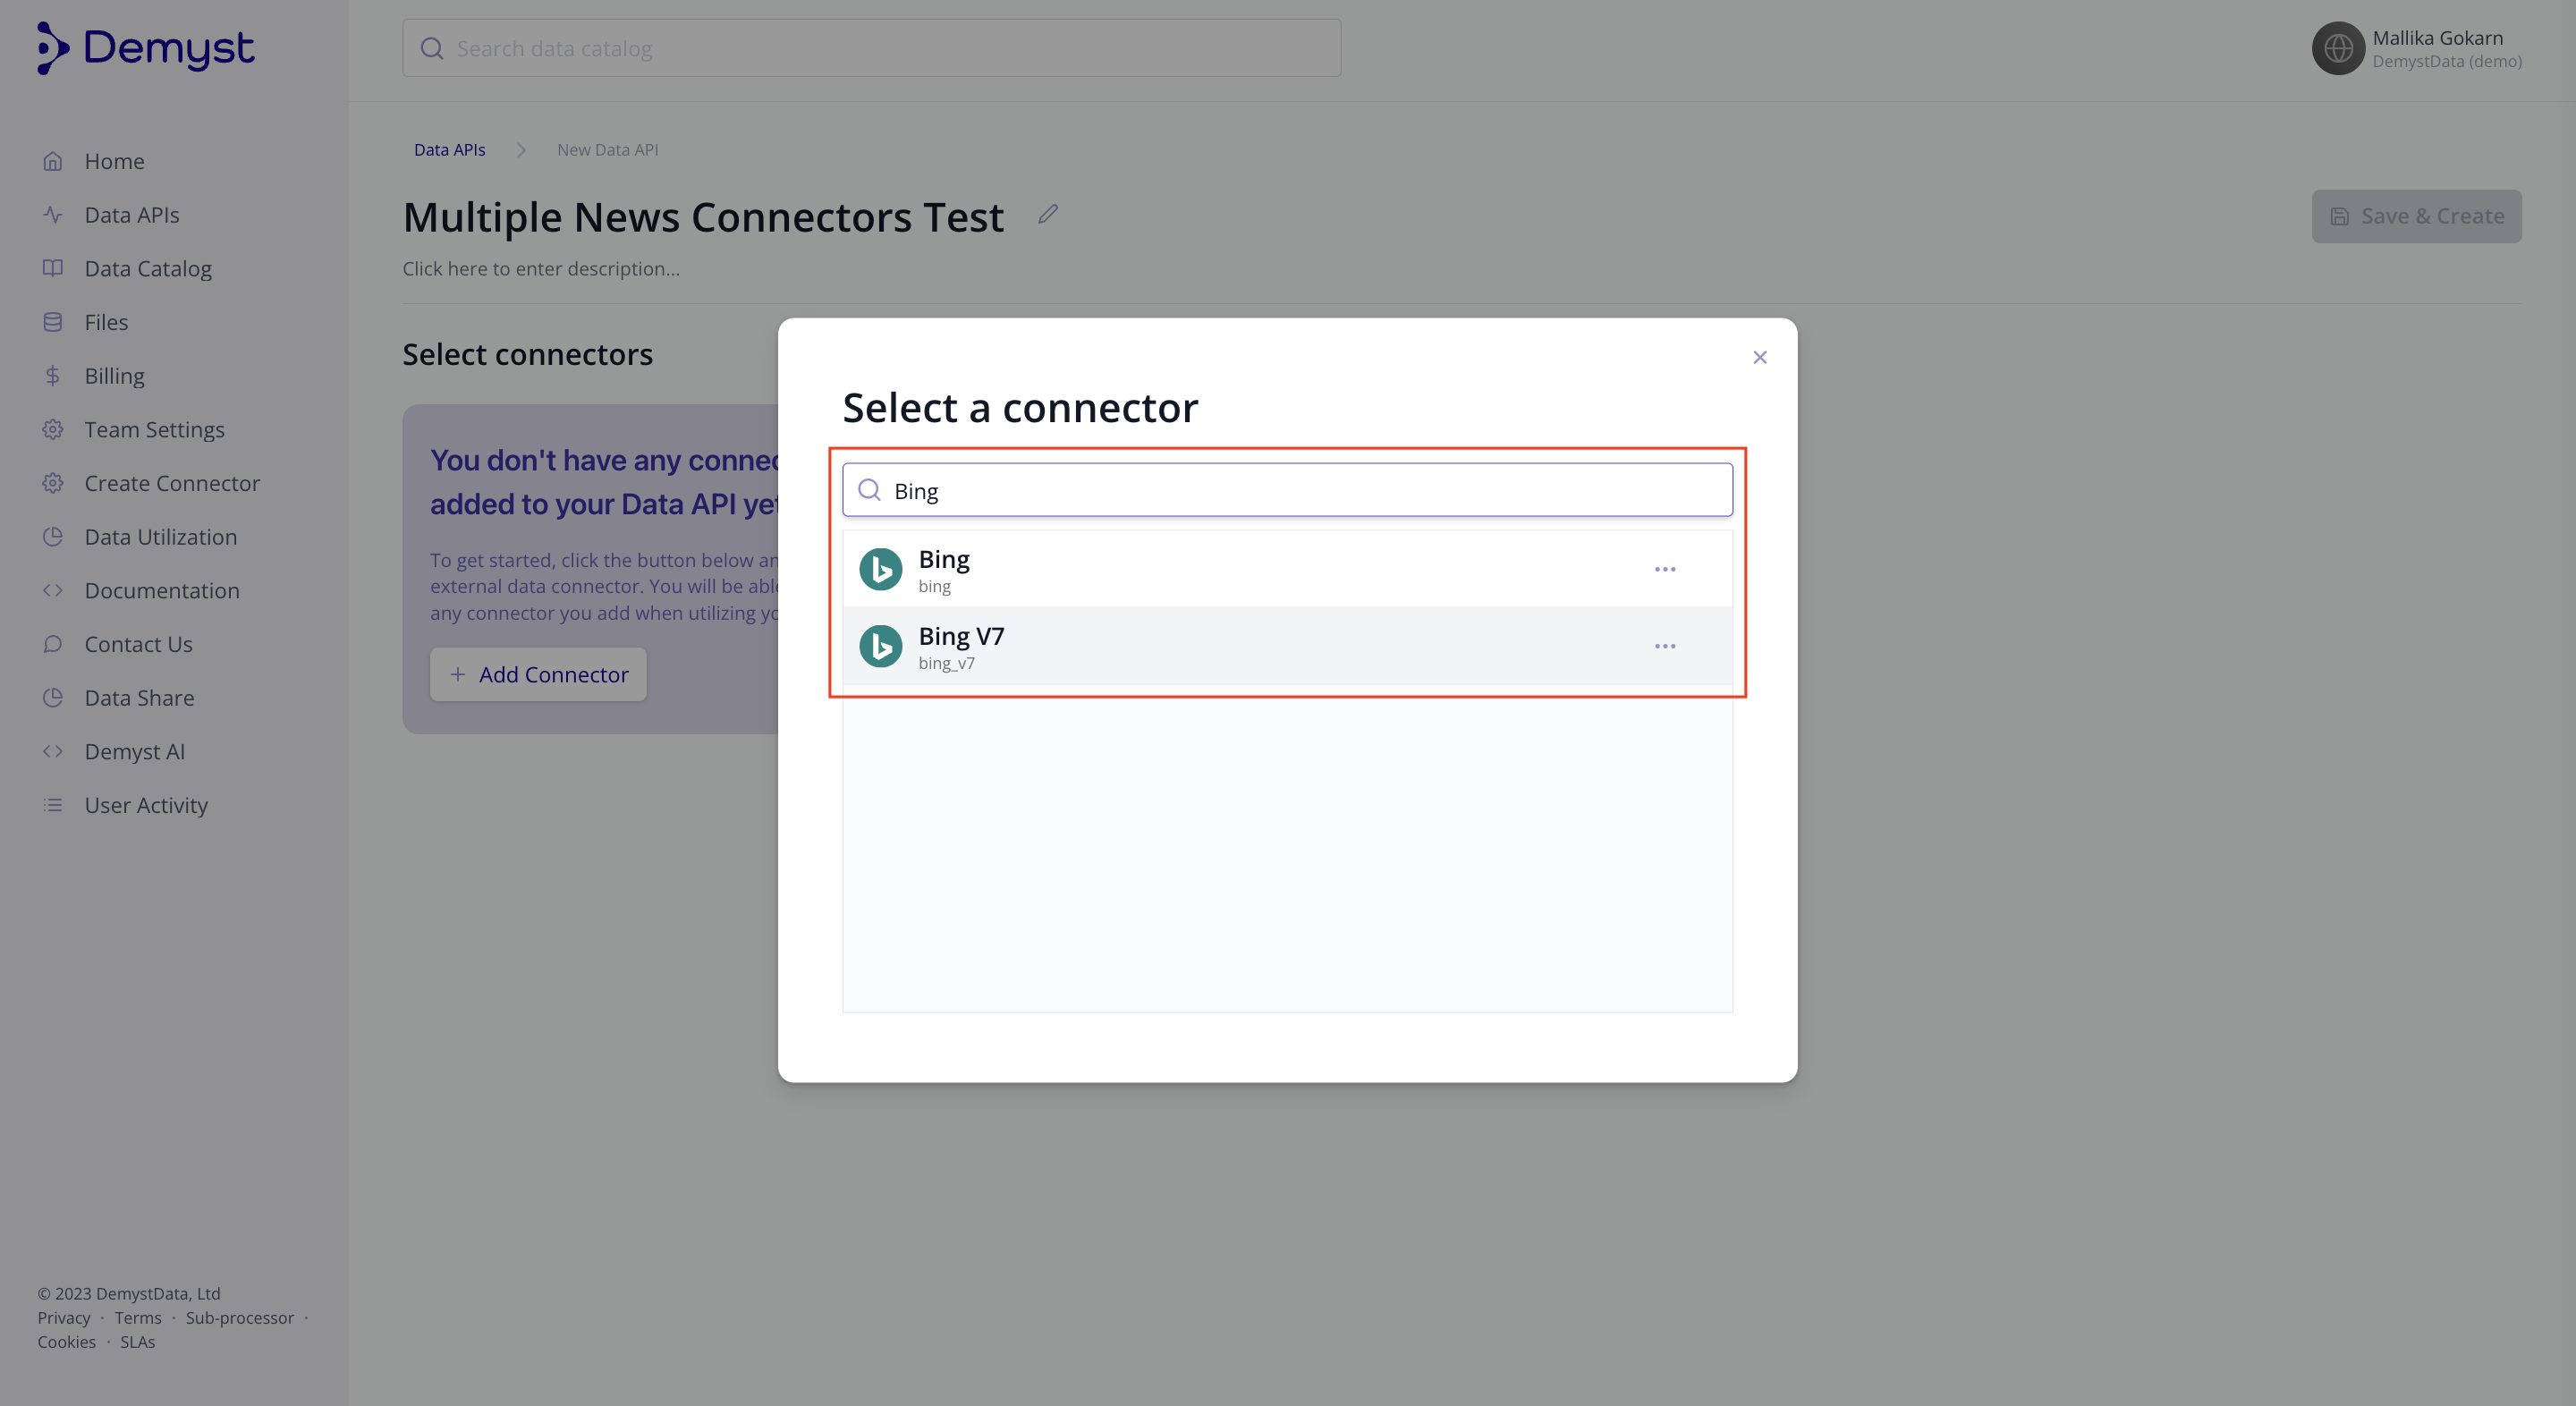
Click on + Add Connector button, search and select the Connector you want to include
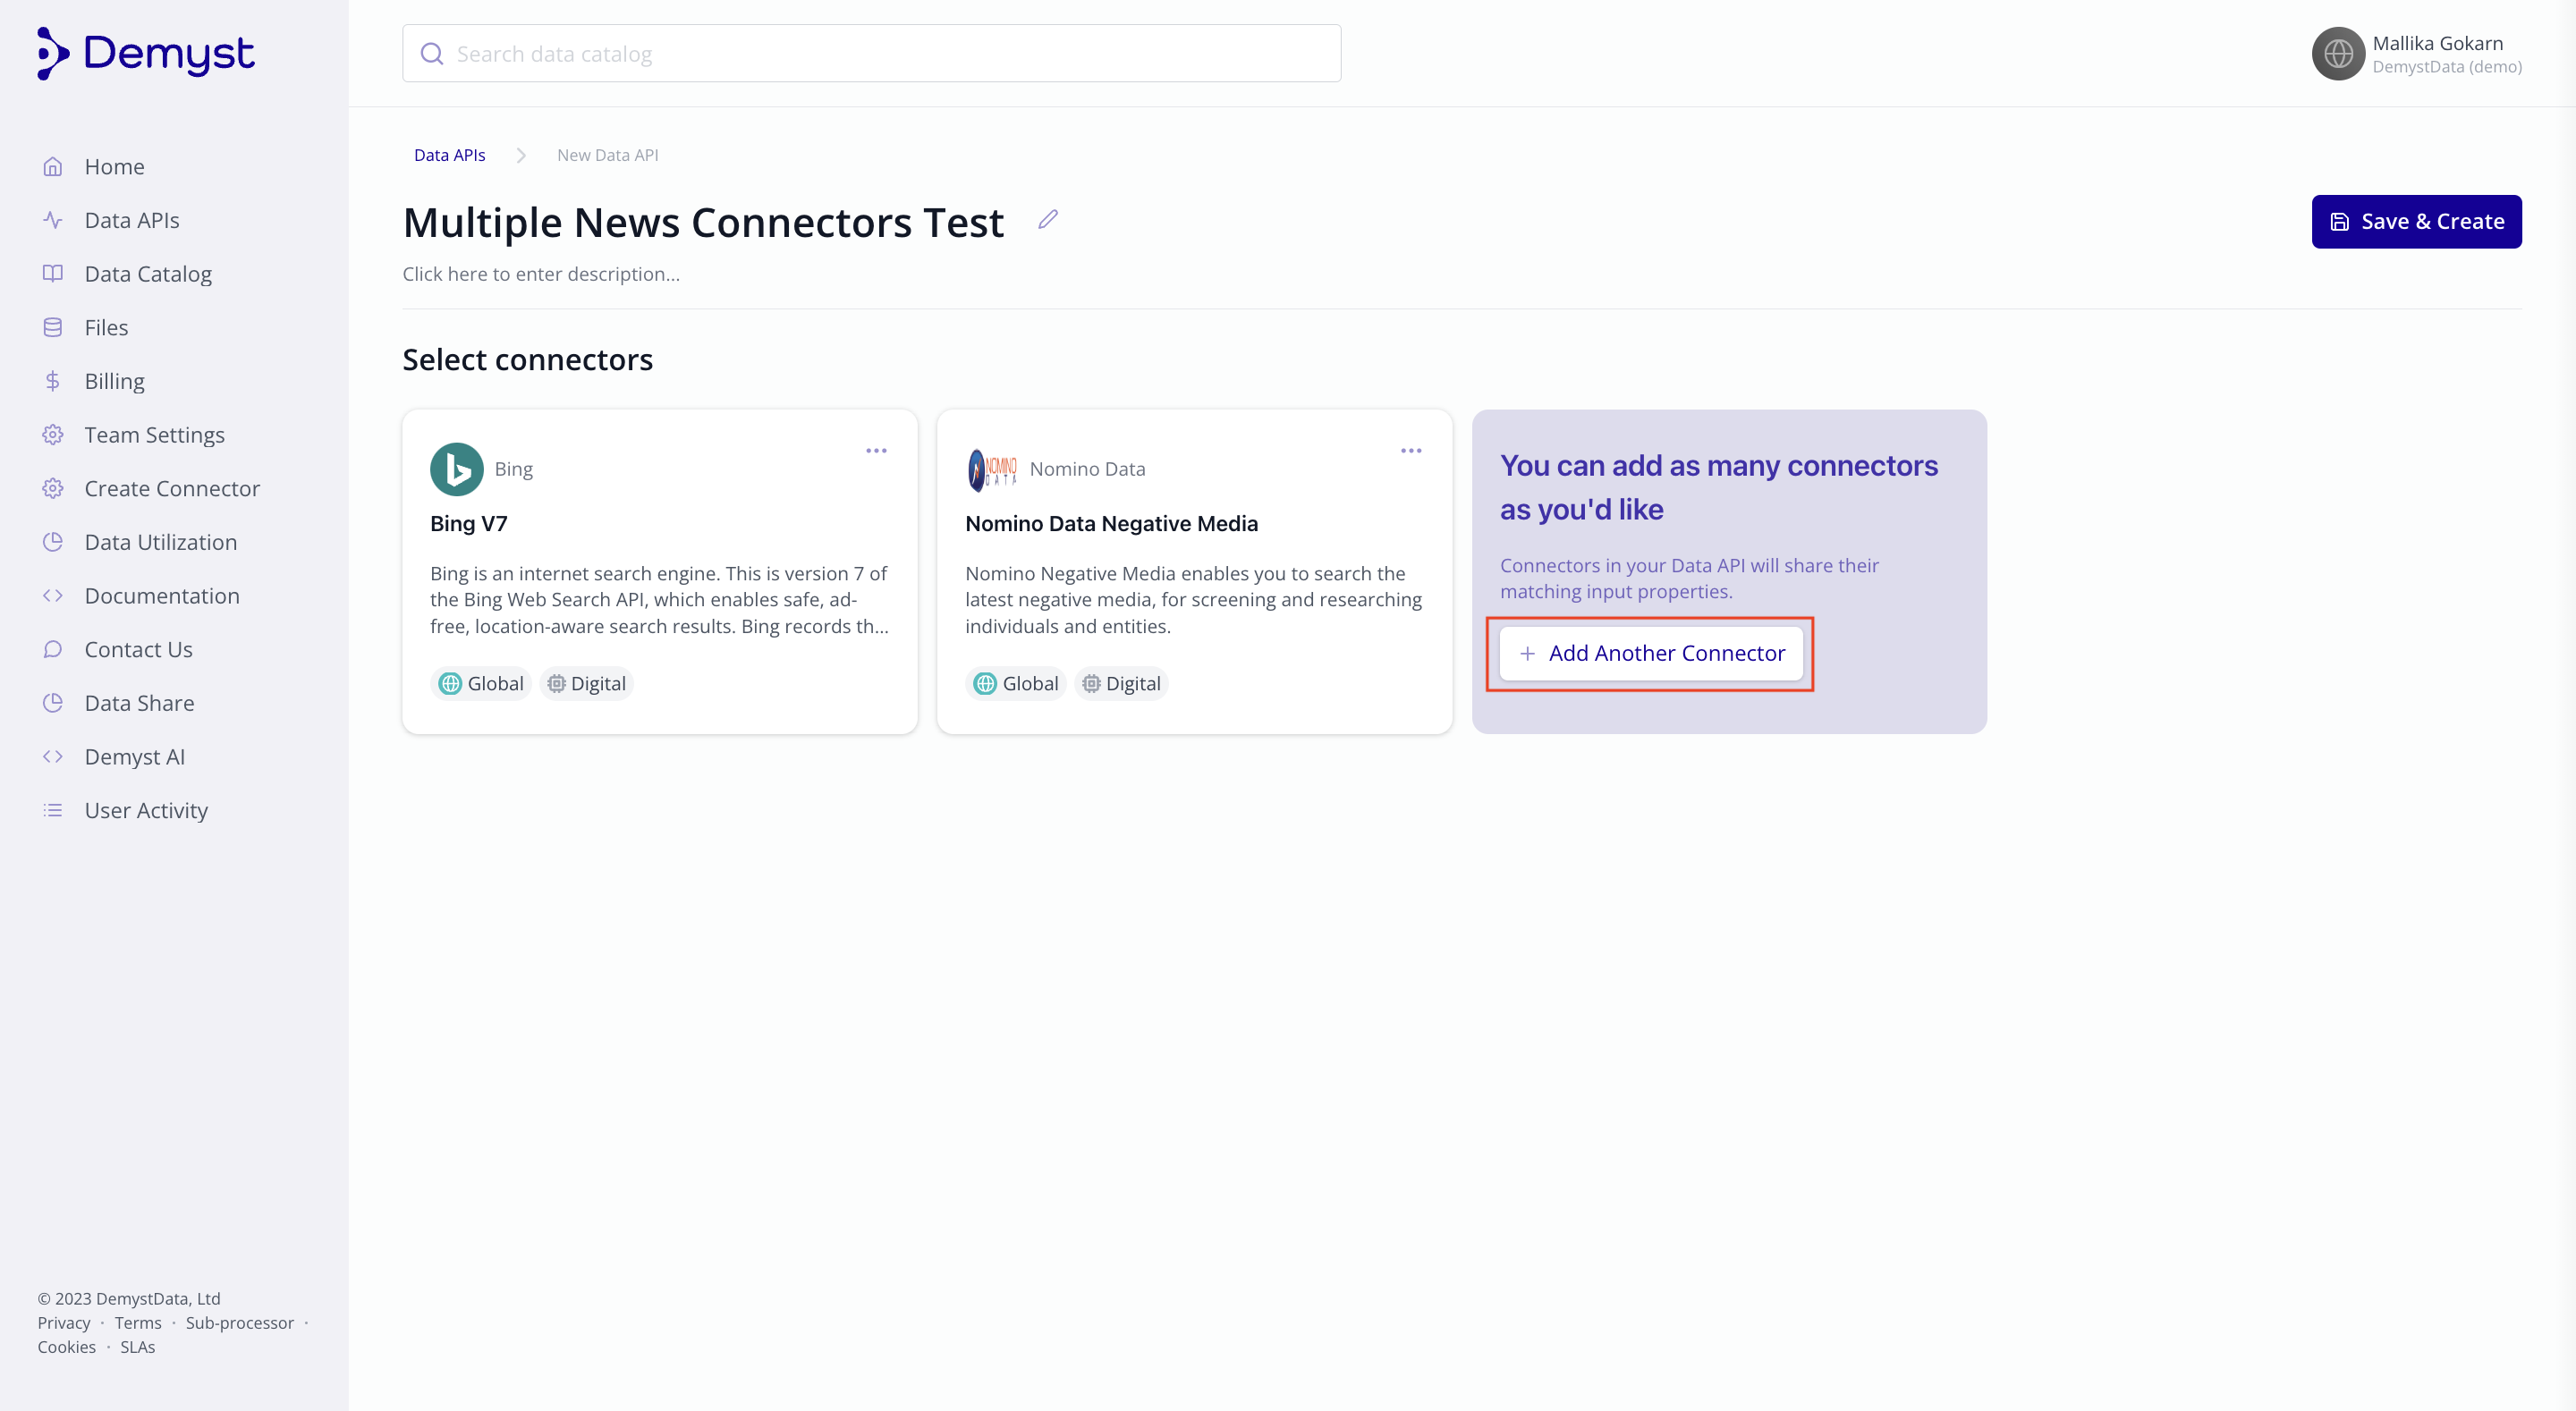
Continue the process by using + Add Another Connector button until all your Connectors have been included.
2 - Save & Create API
Once all relevant connectors are included in your Data API, Save & Create your Data API and accept the terms and conditions for a new evaluation Data API.
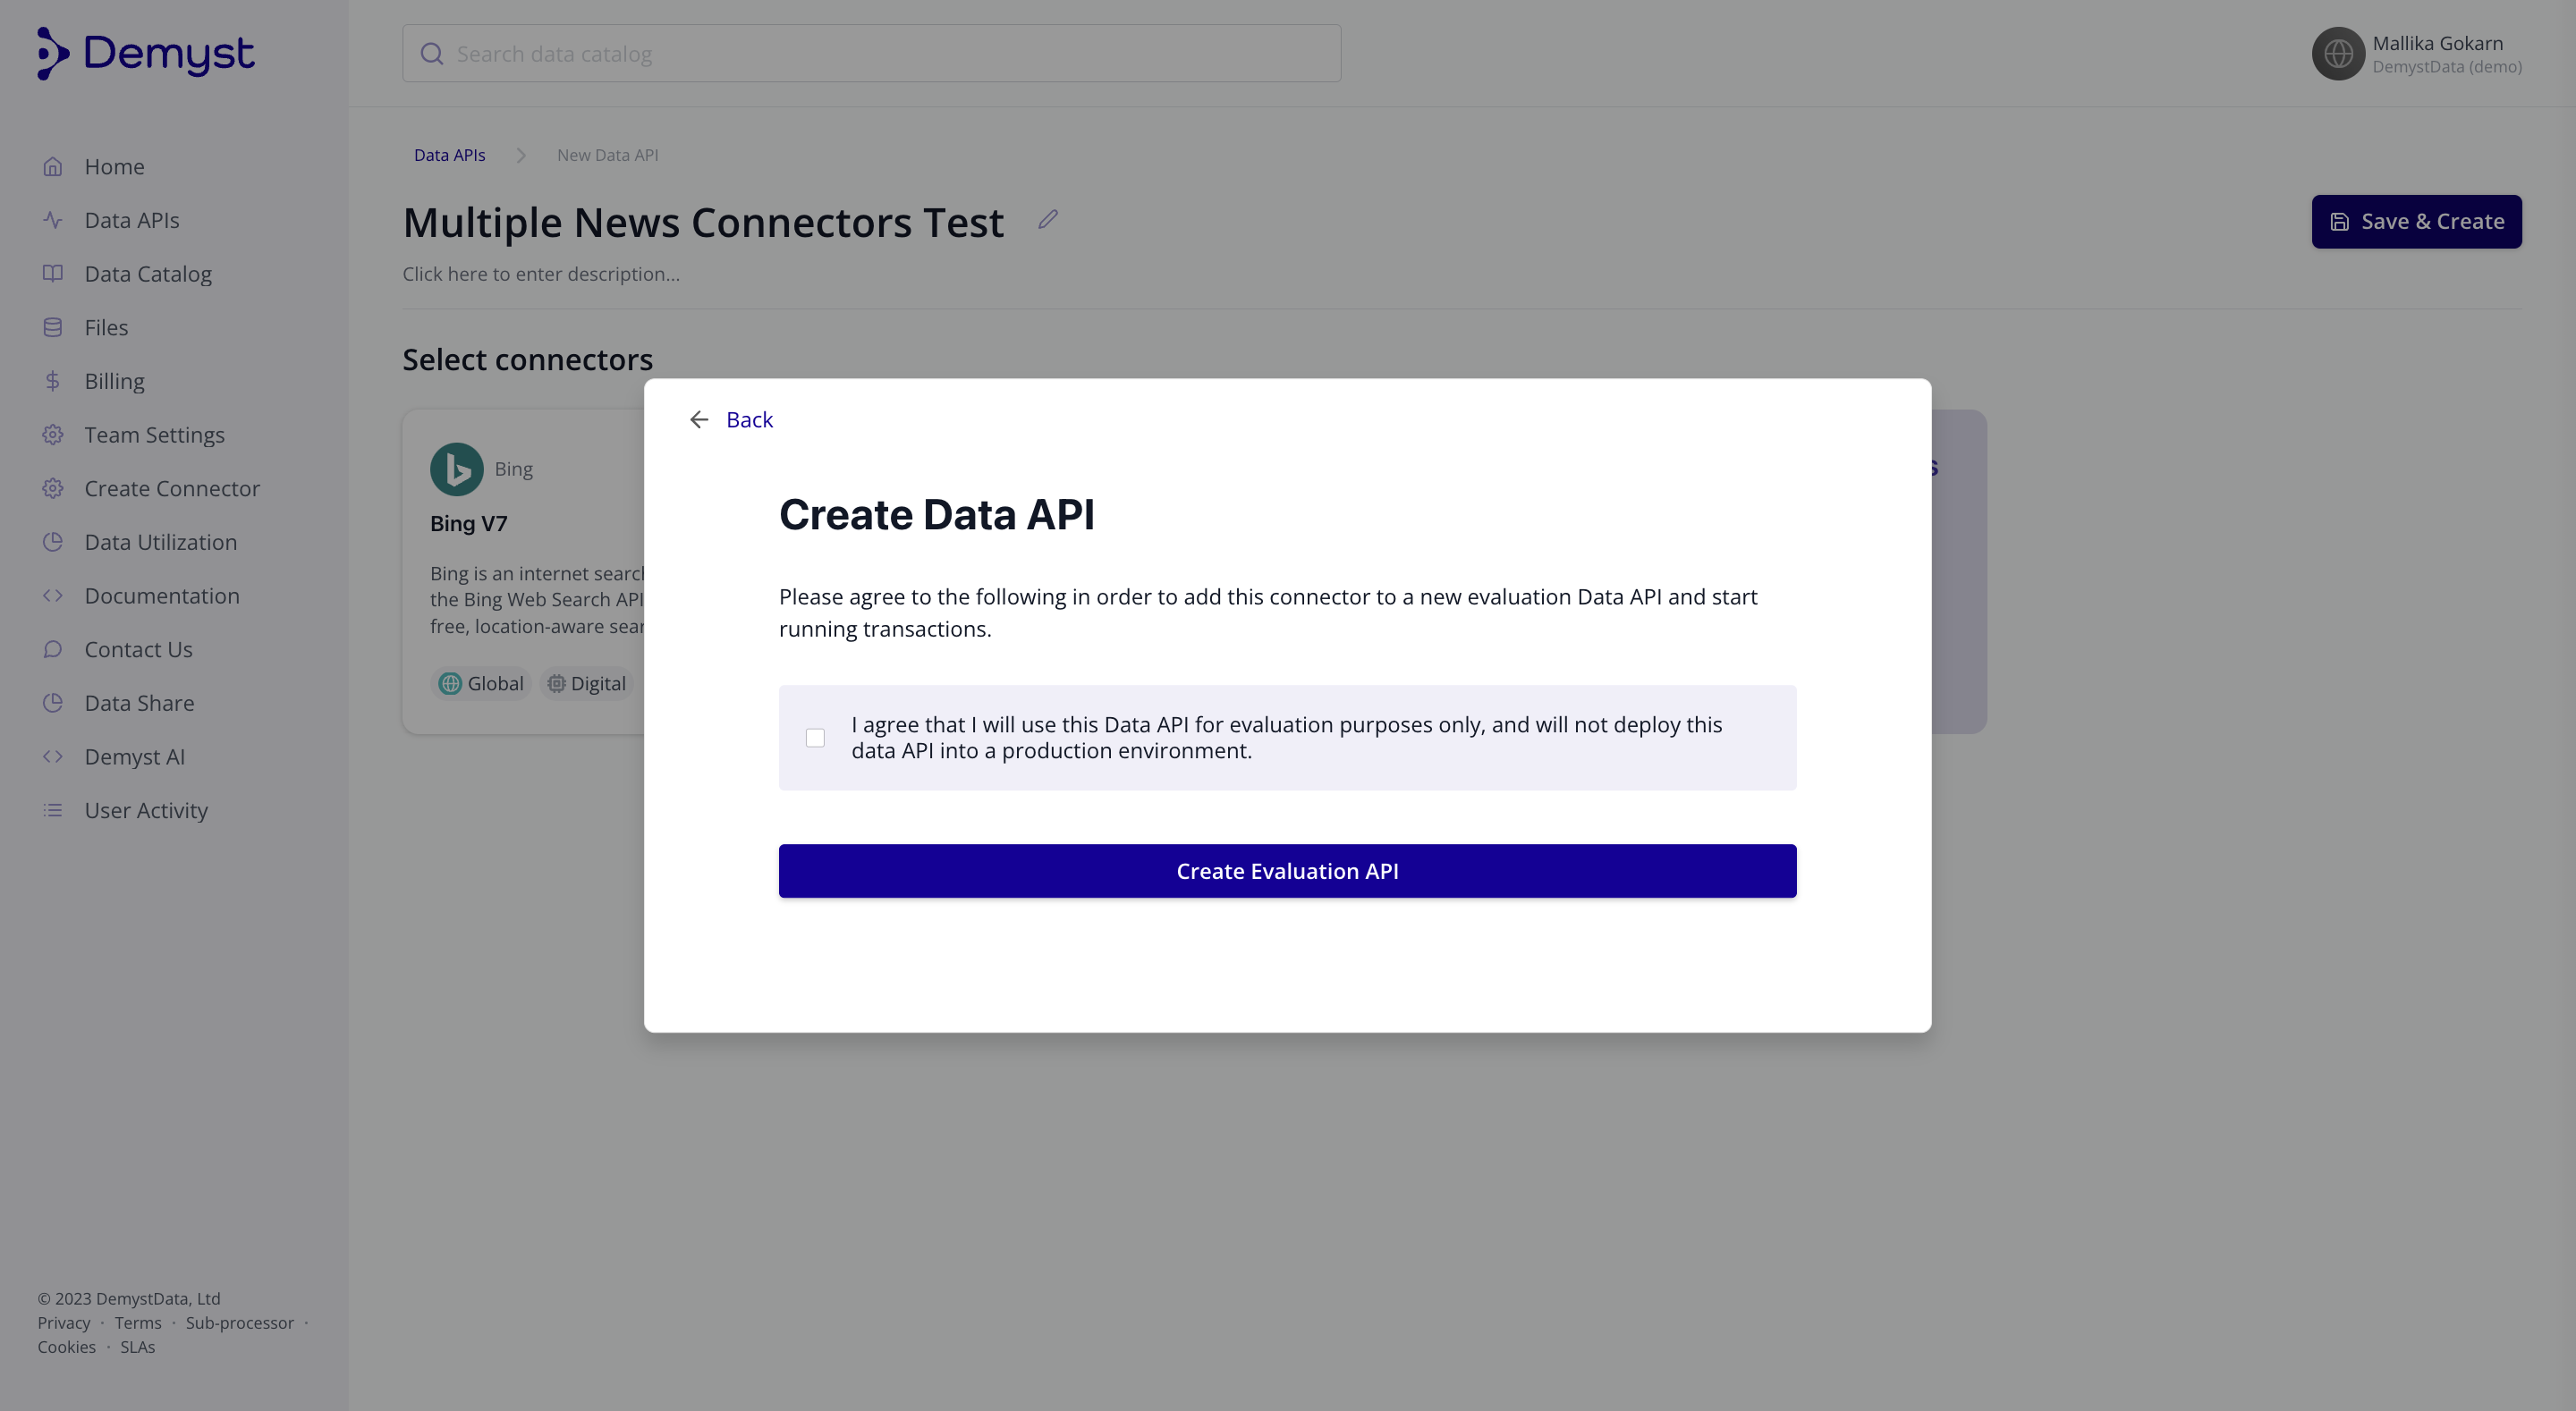
Accept the terms and conditions to Create a new Evaluation Data API.
You've created your first API with multiple Connectors!
(Optional 3) - Edit the configuration
Navigate to the Settings tab to edit the configuration of the Data API until you are satisfied with the custom logic applied. Future guides cover applicable custom logic and Demyst's proprietary Data API configuration language. Note that any changes made here can result in Incorrect Syntax or Broken Logic, so do consult the documentation or reach out to your Demyst representative for help.

Navigate to the "Settings" tab to edit your configuration.
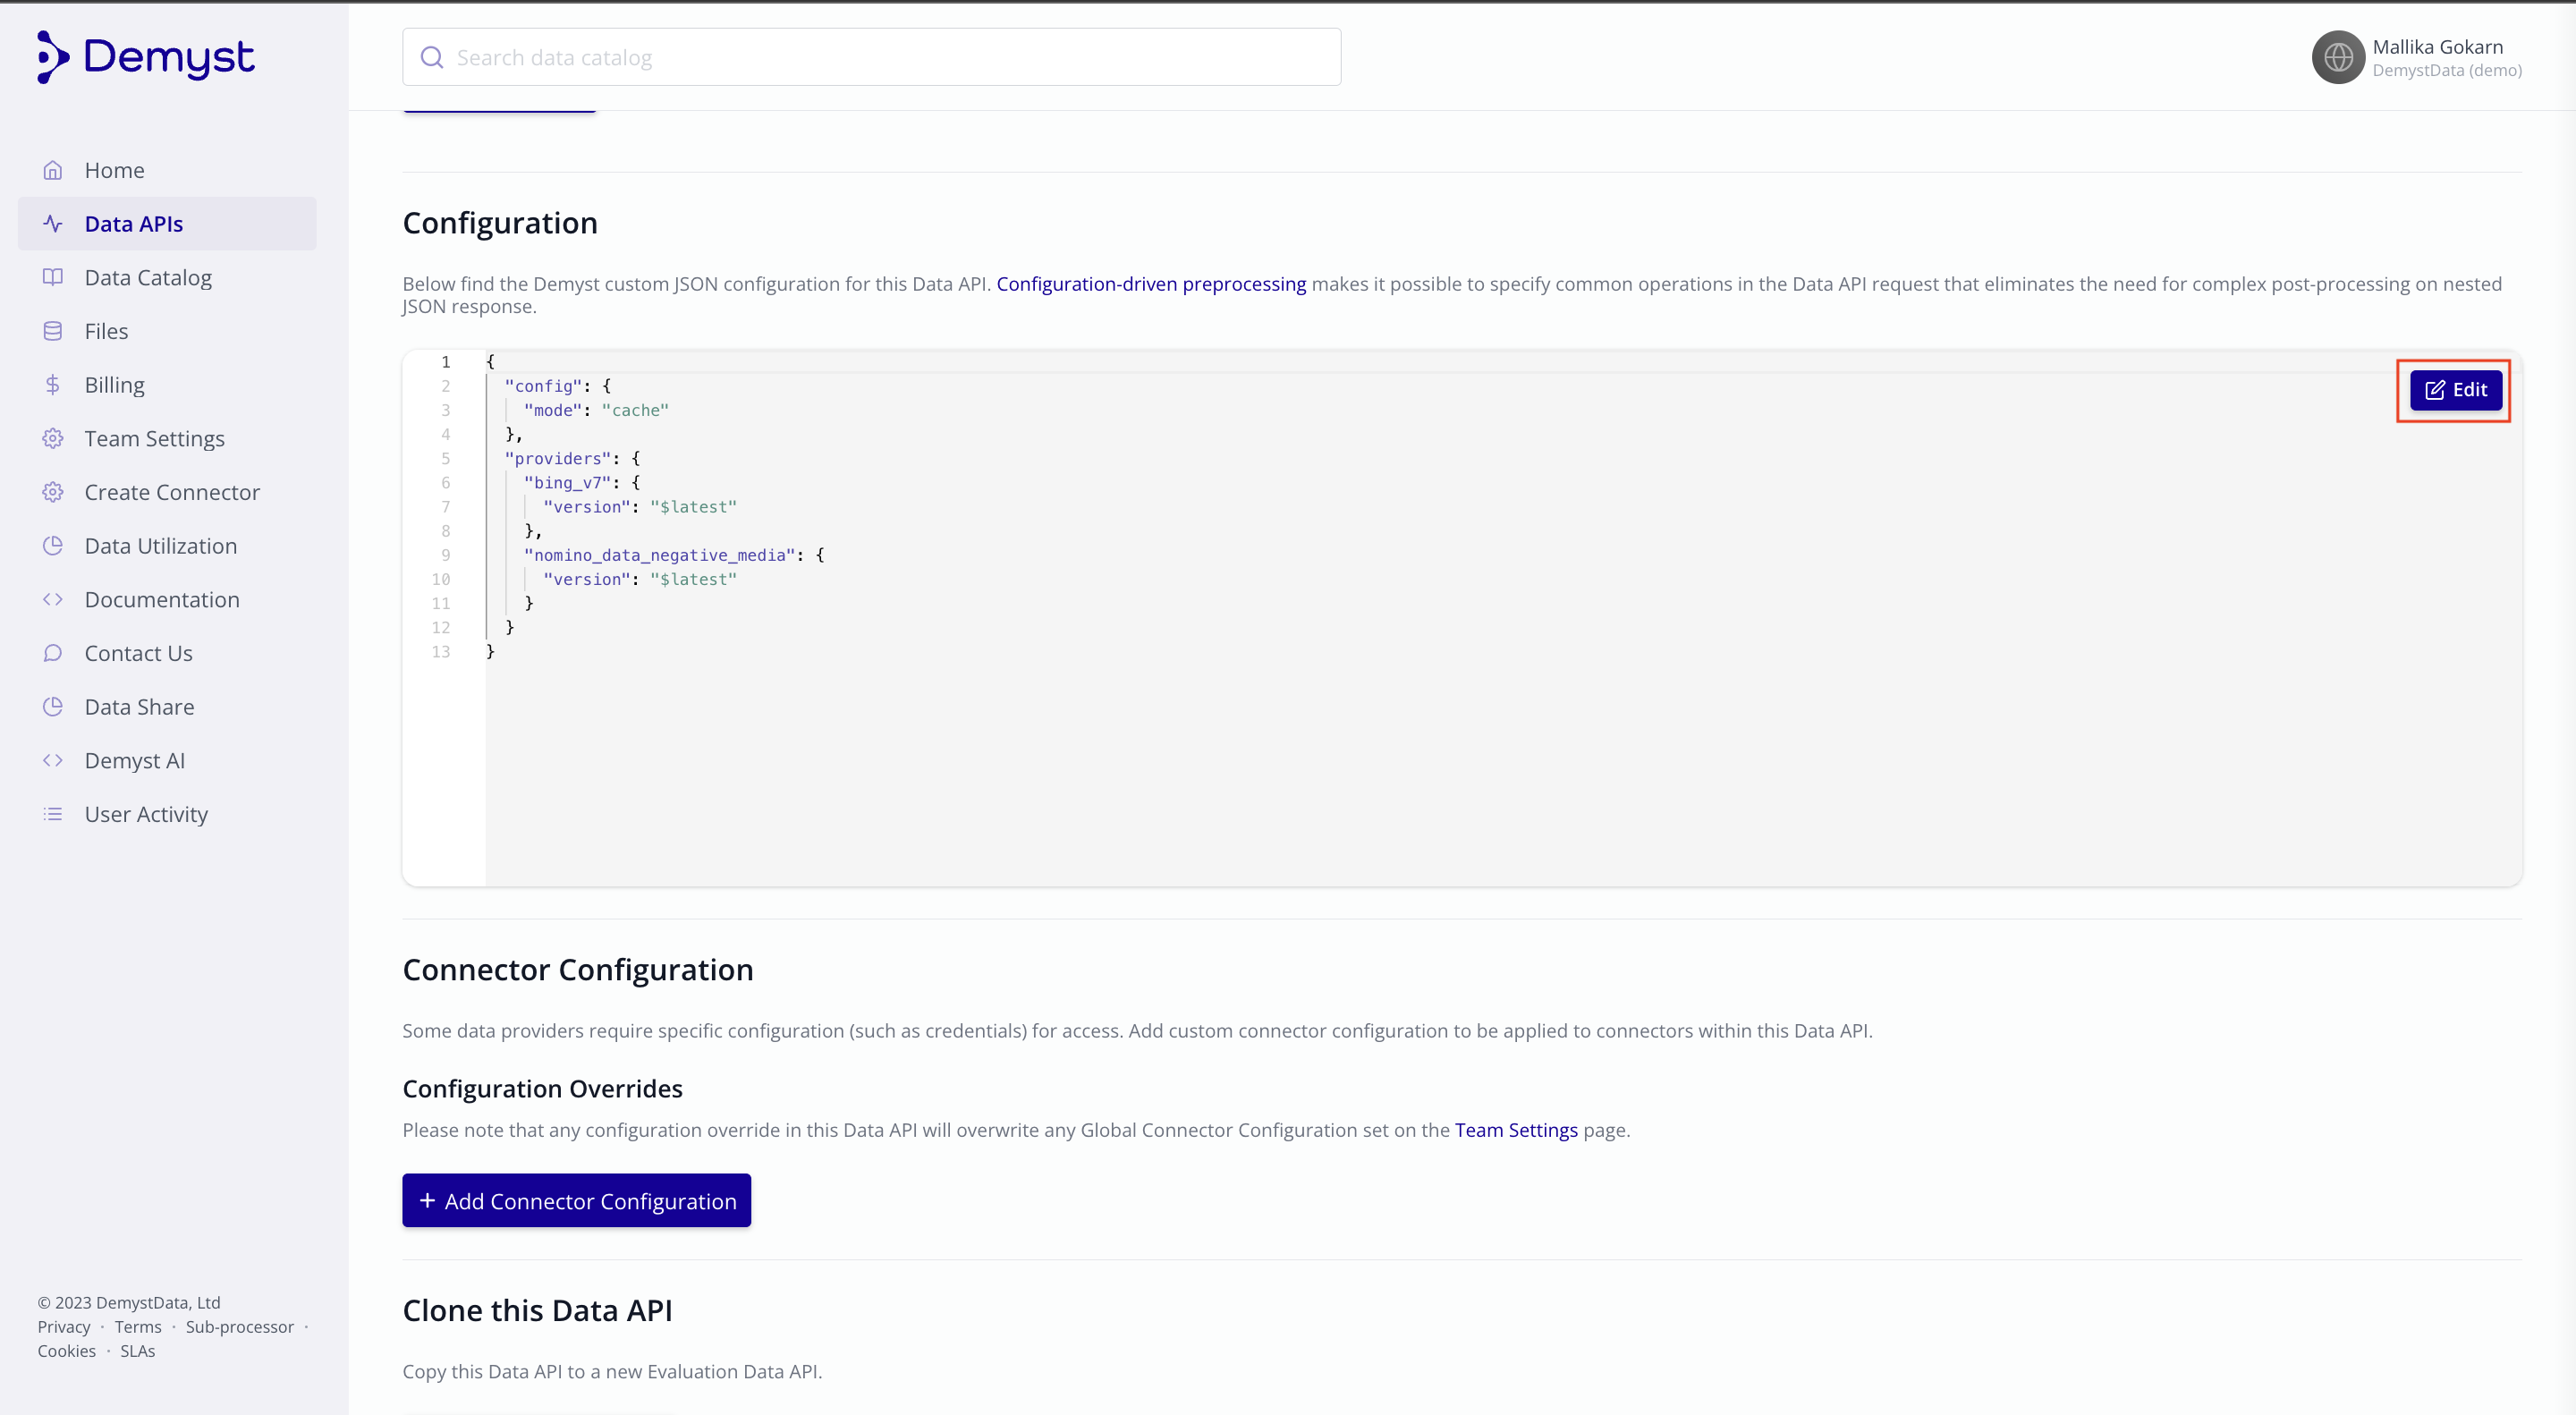
Scroll down to the configuration section and select the "Edit" button to start making changes.
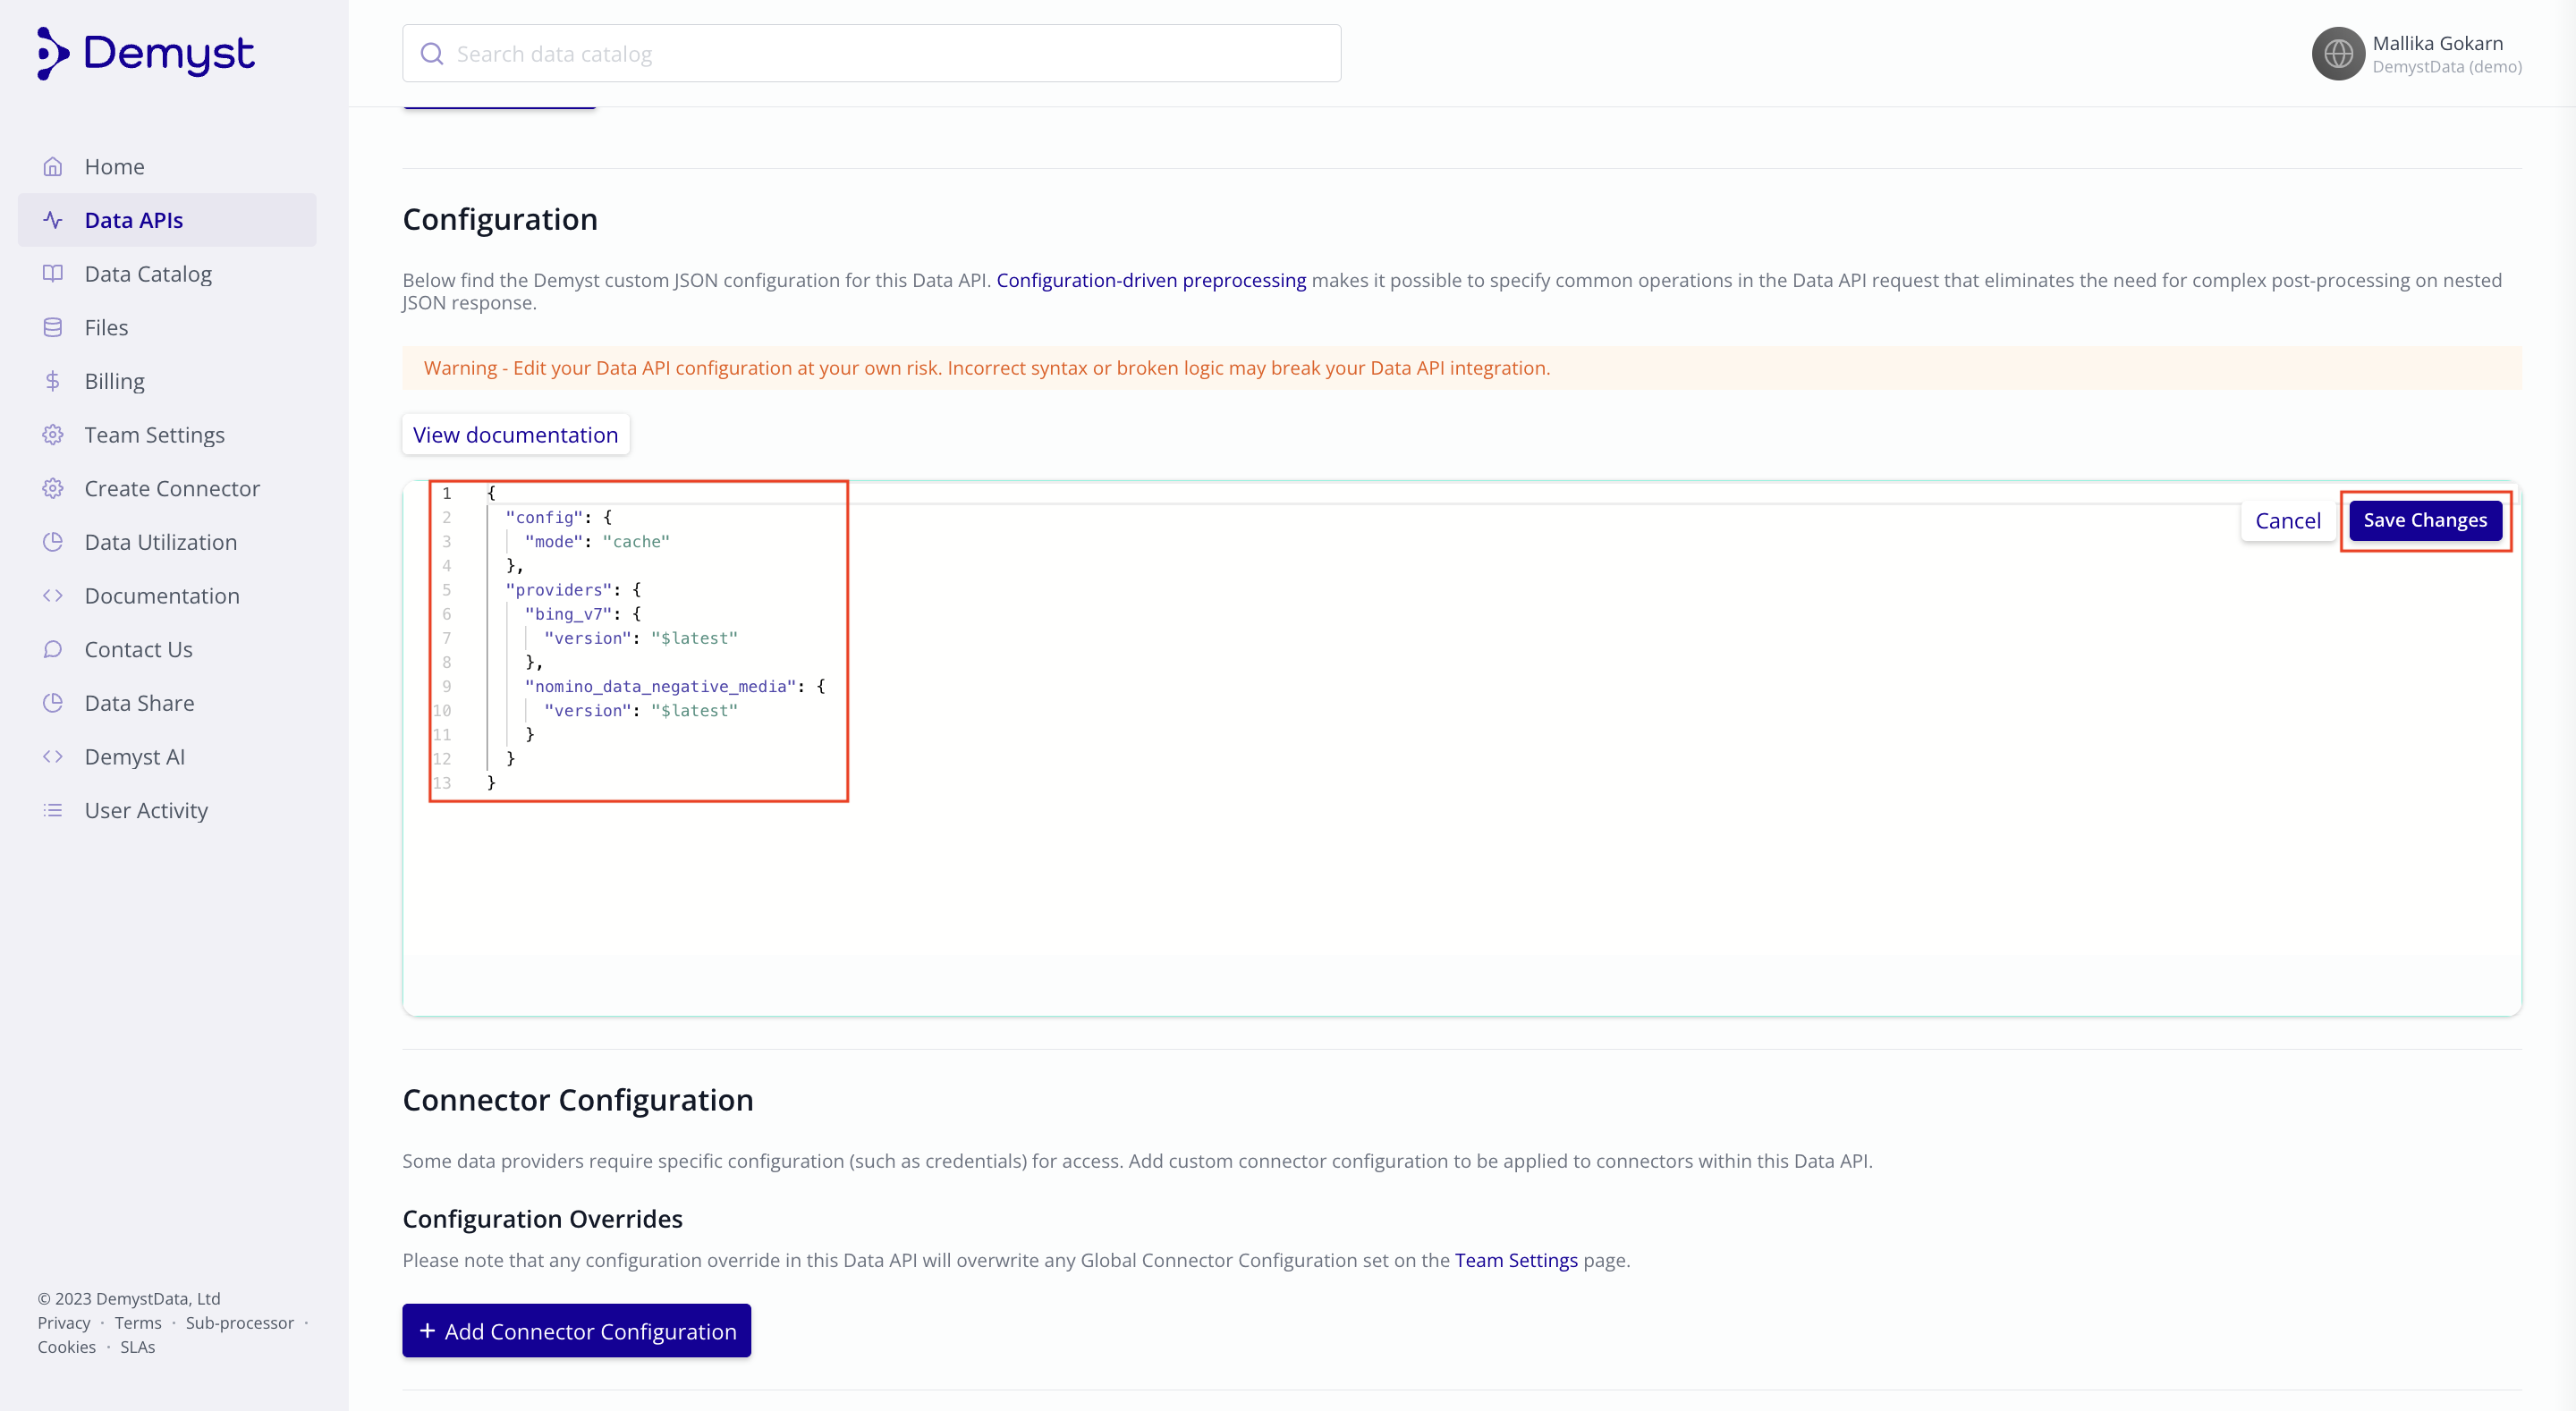
Start editing your configuration and don't forget to "Save Changes" when you're done.
4 - Test your new Data API
Test your new Data API with the sandbox interface or programmatically.
(Optional 5) - Edit the configuration inline
Access the configuration and edit it from Run Transactions tab of your Data API.
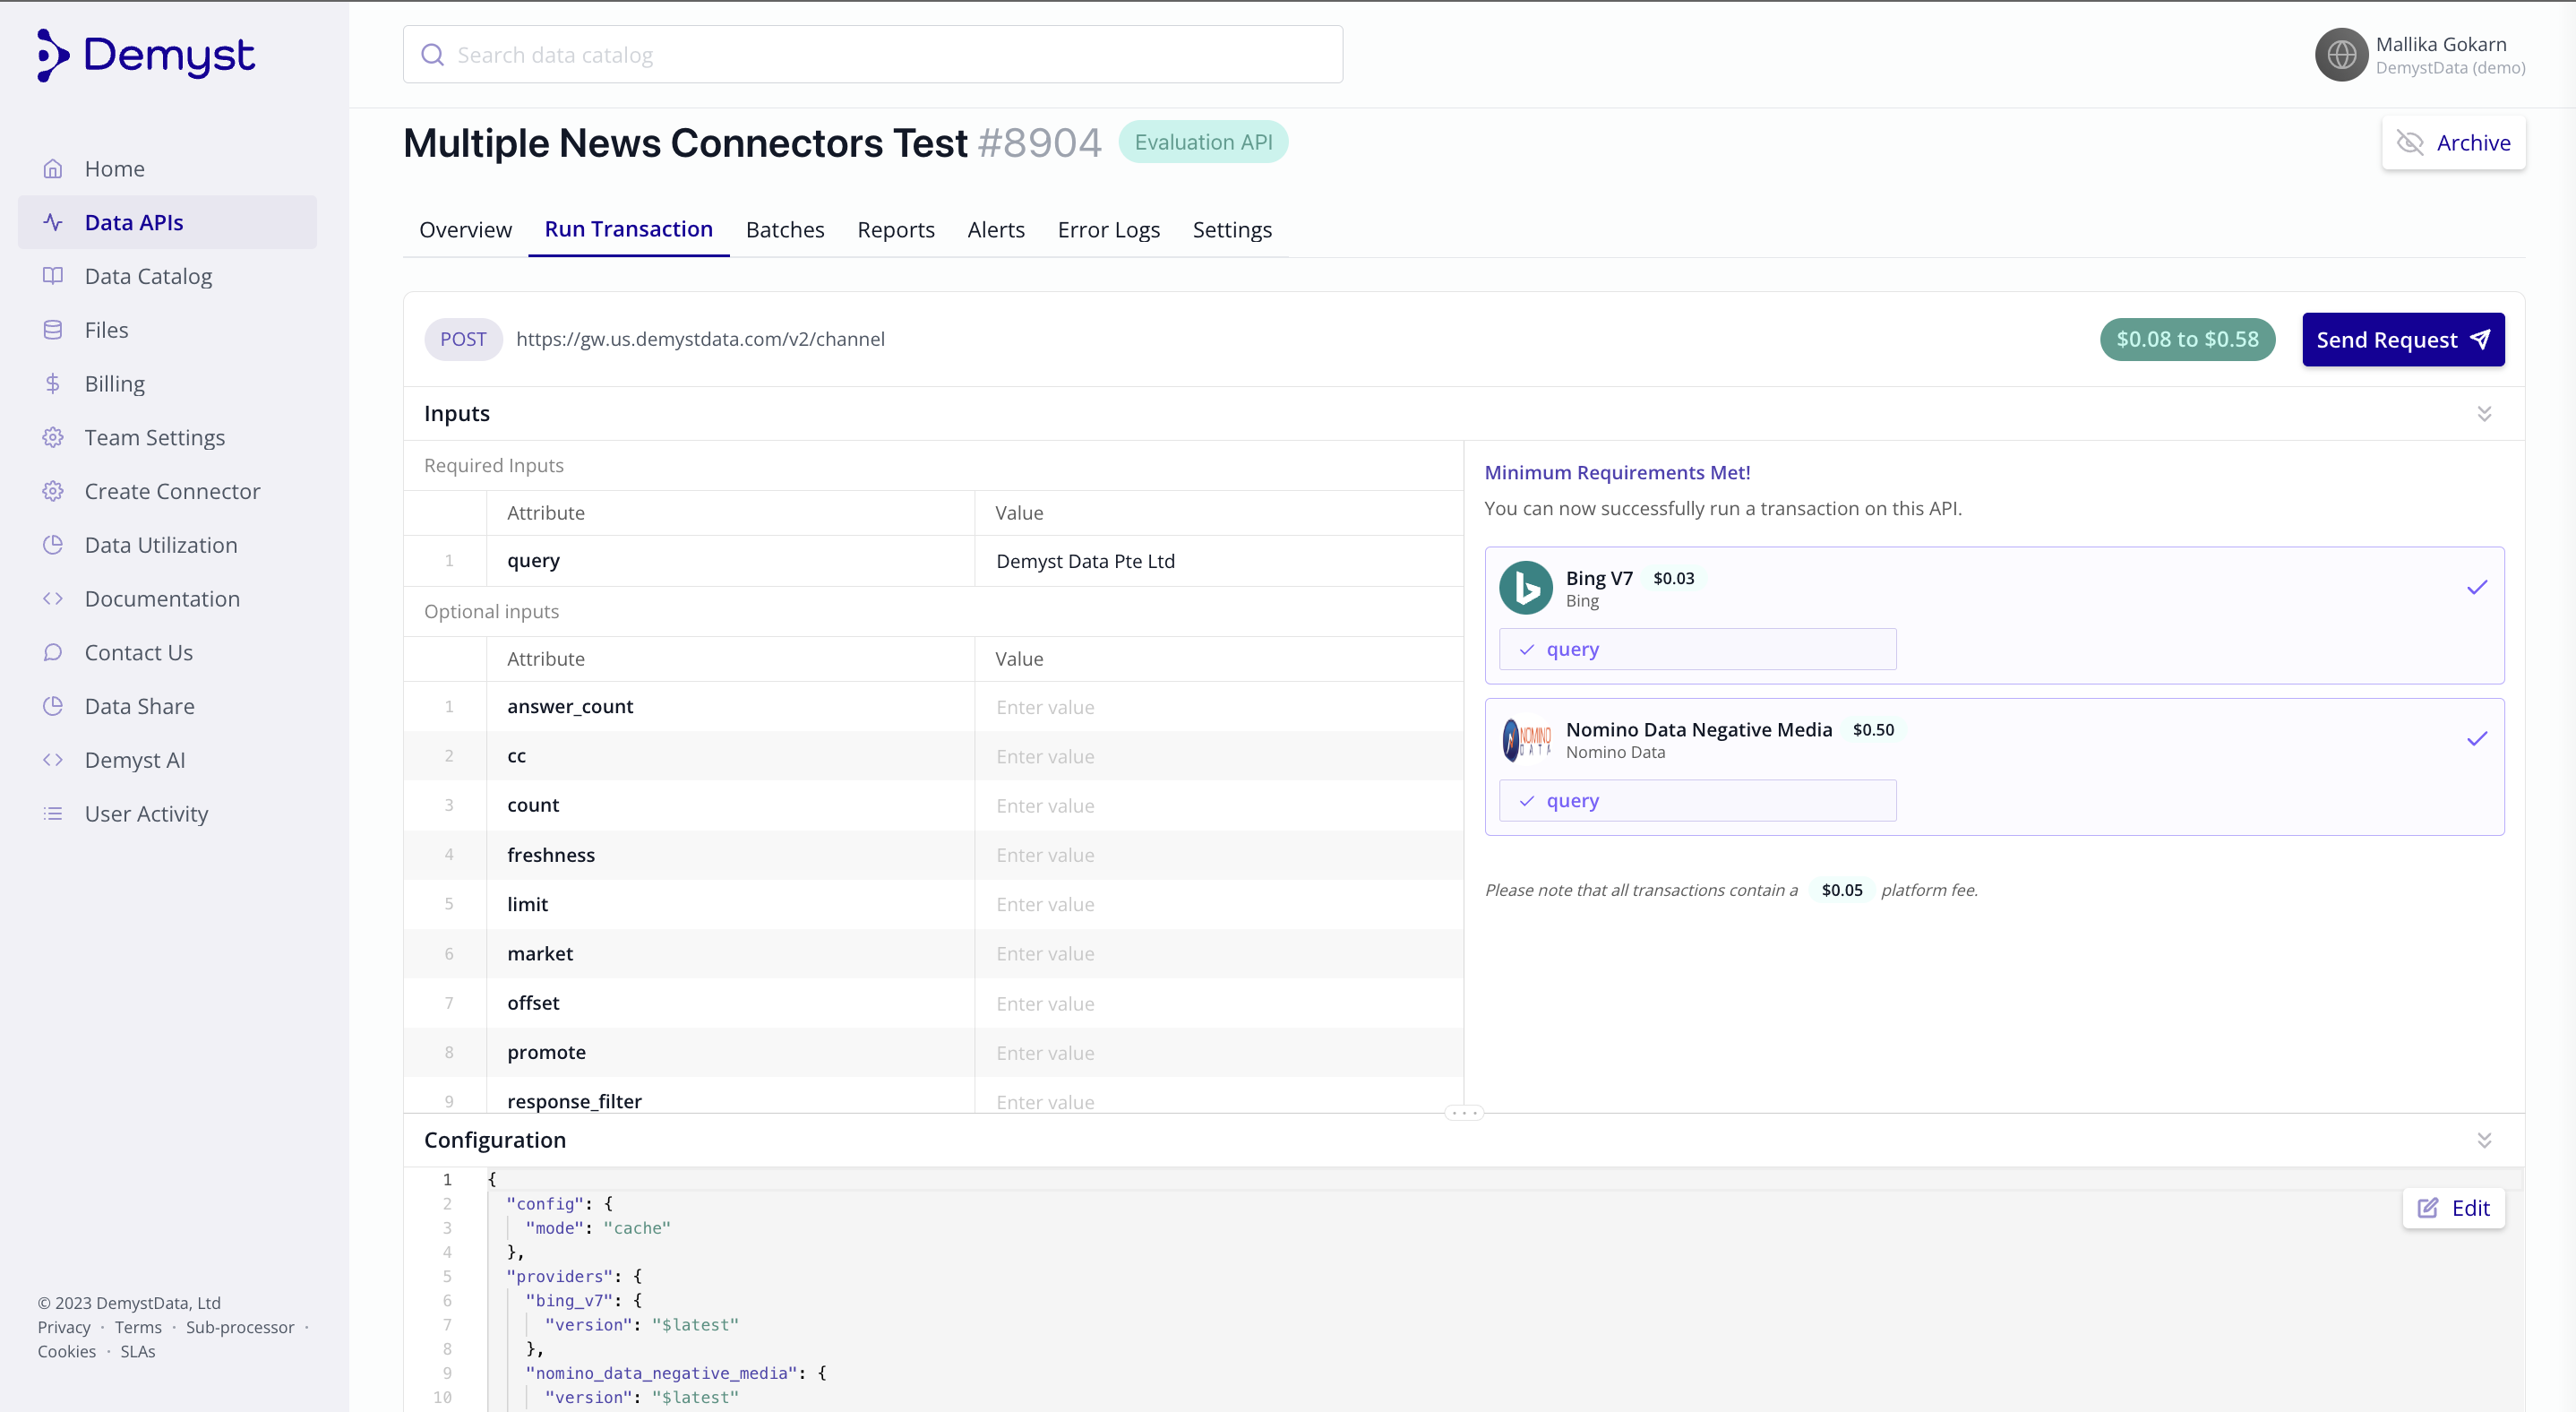
Open the Configuration section, select the Edit button and change the config as needed.
Updated 7 months ago
Next learn about the different ways in which Data API orchestration can be set up to support custom logic and configuration.